dbx 286s: Beyond The Basics …
The dbx brand has been a favorite of mine since the late 1970’s. My first piece of dbx kit was a stand-alone noise reduction unit that I coupled with an old Teac Reel to Reel Tape Deck. Through the years I’ve owned various EQ’s and Dynamics processors, including the highly regarded 160A Compressor. I purchased mine in 2006.
![]()
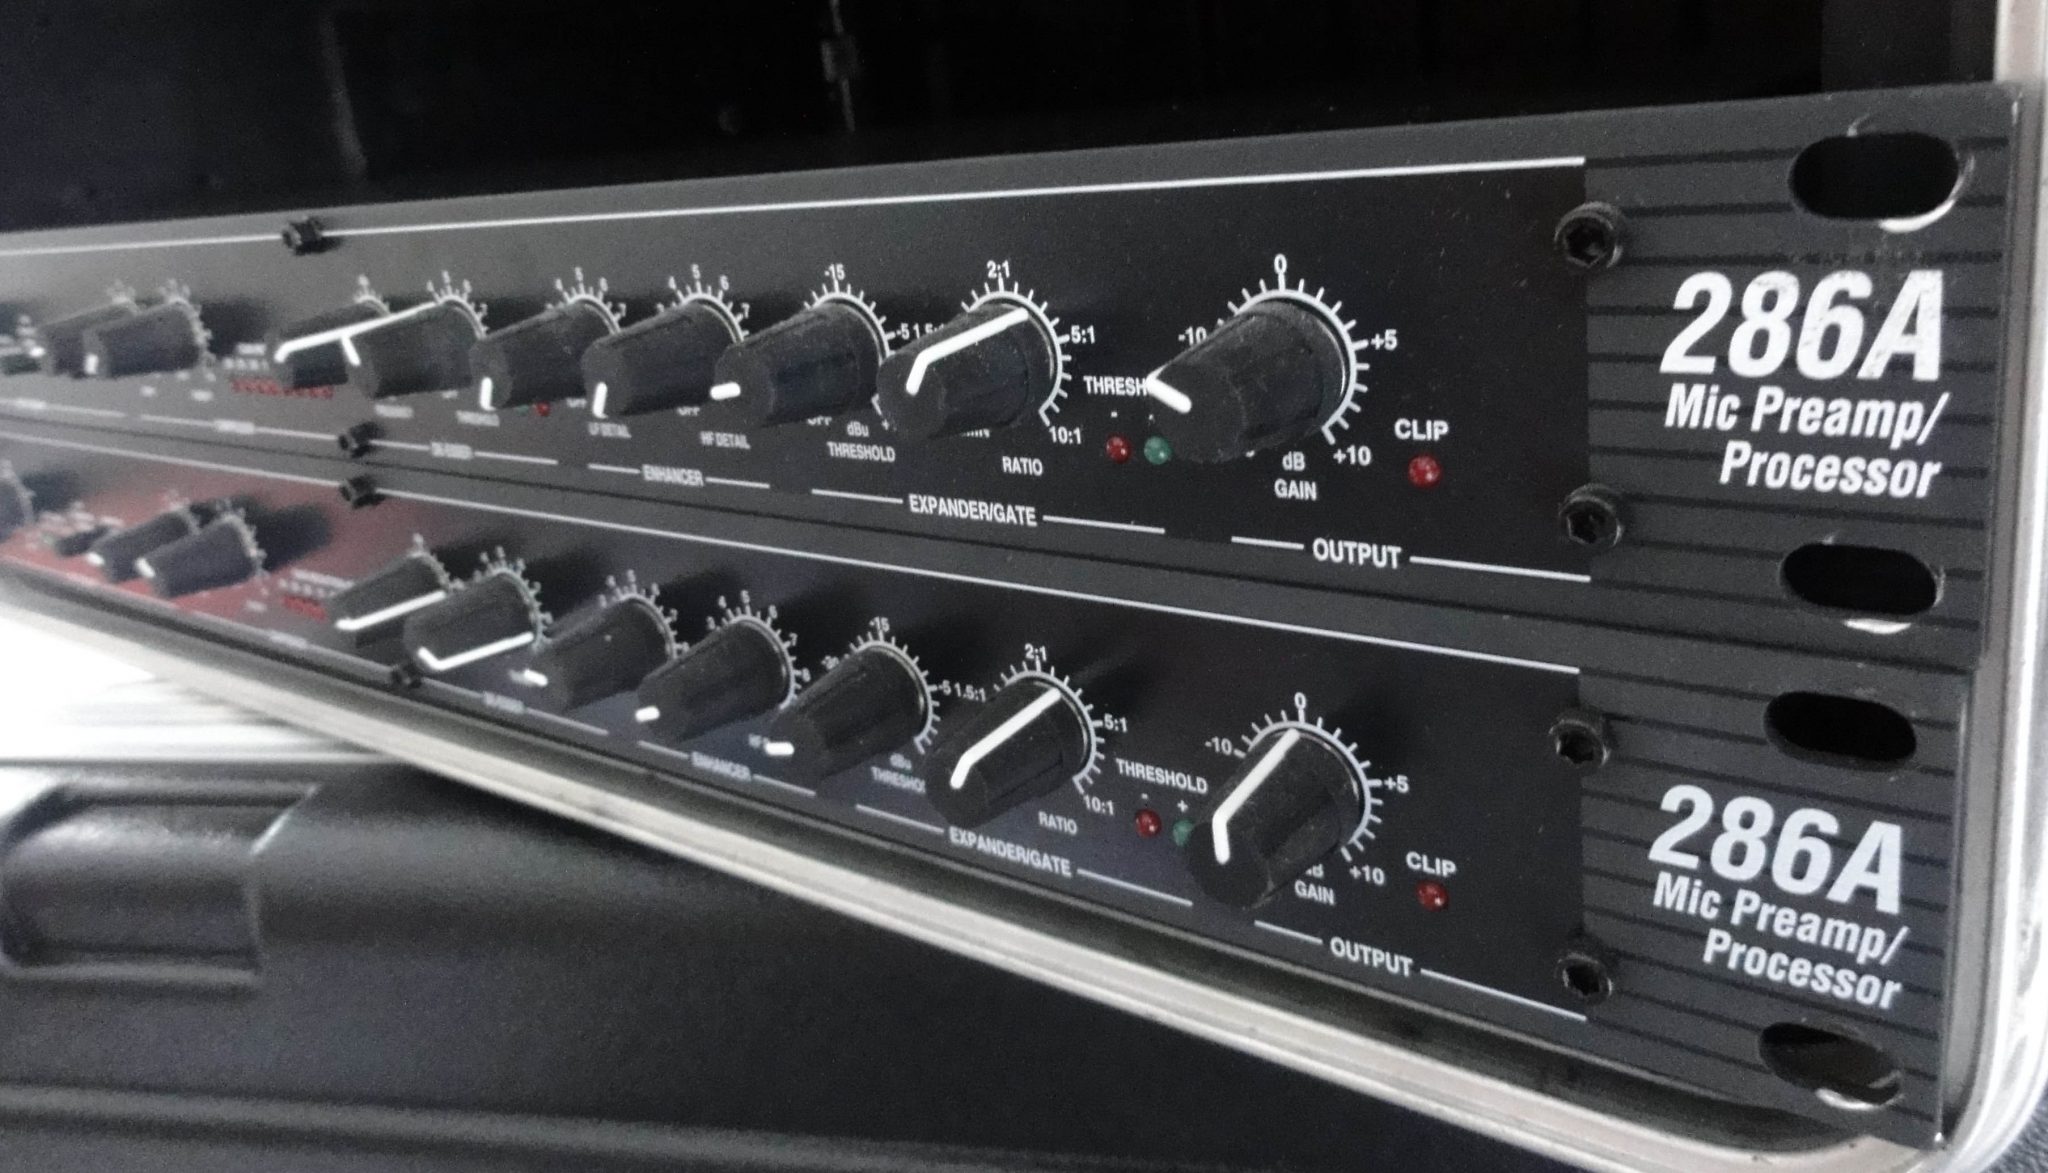
In January 2011 I was skimming through eBay listings looking for a dbx 286A Microphone Preamp Processor. At the time I had heard the original 286 modelwas co-designed by Bob Orban, and both models were widely used in Radio Broadcast facilities. I found it interesting that Radio Engineers would use a piece of gear that was not only cheap in terms of cost – but unconventional in terms of controls.
![]()
One piece was available on eBay, supposedly used for 4 hours at a party in Hollywood Hills California, and then boxed for resale. The seller had a positive reputation, so I grabbed it for $115. Upon arrival it’s condition was as described, and it’s been in my rack ever since.
The 286/286A has evolved into the 286s, quite frankly an outright steal priced at $199. Due to it’s straight forward approach and affordable price, the Podcasting community has embraced it and often classifies it as “drool-worthy.” Pretty amusing.
![]()
In this article I am going to discuss the attributes of the Compressor stage and the De-Esser. I’ll demystify the DeEsser and talk about the importance of the Output (Gain) Compensation setting.
Unconventional
I mentioned the processor is unconventional. For example the Compressor’sDrive and Density controls essentially replace Threshold, Ratio, Attack, and Release – present on most Compressors.
The De-Esser requires a user defined High-Pass Frequency designation andThreshold to reduce excessive sibilance. Setup can be time consuming due to the lack of any visual representation of problematic energy in need of attenuation.
Compressor:Drive
Compression results depend on the level (and dynamics) of the incoming signal and the corresponding settings. On a conventional compressor the Threshold monitors the incoming signal. When the signal surpasses the Threshold, processing engages and gain reduction is activated. The Ratio determines the amount of gain reduction. The Attack will affect how aggressively (or the speed at which) gain reduction initializes and then reaches maximum attenuation. The Release will control the speed of the transition from full attenuation – back to the original level
The Drive control on the 286s determines the amount of gain reduction (compression) that will be applied to the incoming signal. Higher settings will increase the input signal level and yield more aggressive compression (and noise).
How much gain reduction should you shoot for? Well that’s subjective. I would recommend experimenting with 6-12dB of gain reduction. Of course results will vary on a case by case basis due to obvious variables (mic selection, preamp level, etc.)
Compressor:Density
When using a compressor to process spoken word, improper Release settings can result in choppiness, often referred to as pumping. The key is to have the gain reduction occurrences smoothly transition between instances of audible sound and natural pauses (silence).
The 286s uses a variable program dependent Release. In the event you feel (and hear) the necessity to speed up or slow down the program dependent Release – the Density control will come in handy.
Note that the Density scale on the 286s is again somewhat unconventional. On a typical dynamics processor – setting the Release full counter-clockwise would result in a very fast Release. As the setting is adjusted clockwise, the Release duration would be extended. The scale usually transitions from milliseconds to full seconds.
On the 286s, think of Density as a linear speed controller, where “1” (counter-clockwise) is slow and “10” (full clockwise) is fast.
For normal speech I would recommend experimenting with the Density set between 3 and 5.
The De-Esser
If you check around you will notice a wide range of references regarding the frequency range where sibilance generally occurs. In reality there are so many variables and each instance of sibilance will need to be properly identified and handled accordingly.
The 286s De-Esser uses a variable high-pass filter that tells the processor where to begin to attenuate problematic energy. This Frequency control has a range of 800Hz-10kHz. The user manual states ” … settings between 4-8kHz will yield the best results for vocal processing.” This is good starting point. However proper setup requires time consuming arbitrary tweaking that may result in a low level of accuracy. A visual representation of the frequency range of the excessive sibilant energy will solve this problem. Once you identify the frequencies and/or range where most of the energy is present, setting the Frequency on the 286s will be demystified.
The De-Esser’s Threshold setting controls the amount of attenuation (sensitivity) and will remain constant as the input level changes.
Have a look at the spectral analysis below:

Notice the excessive energy in the 2-6kHz range (Frequency Range is represented on the X axis). For this particular segment of audio I would initially set the Frequency control on the 286s to 5kHz. Next I would adjust the Threshold until the sibilant energy is attenuated. I would then sweep the Frequency setting within the visual range of the sibilant energy and fine tune both settings until I achieve the most pleasing results. The key is not to over do it. Heavy attenuation will suppress vital energy and remove any hint of natural presence and sparkle.
To perform this analysis excersize – set the Threshold setting on the 286s to OFF. Pass the output of the processor to your DAW of choice and perform a real time spectral analysis of your voice using a software plugin the includes a Spectrum Analyzer. You can use any supported EQ plugin with it’s controls bypassed. You can also use something like the free (AU/VST) Span plugin by Voxengo (note that Span is CPU intensive).
Output Gain Compensation
Gain Compensation is an integral part of Audio Compression. It is most commonly used to offset the gain reduction that occurs when audio is compressed. It is often referred to as Make-up Gain. When this gain offset is applied to compressed audio, the perceived, average level of the audio is increased. Excessive Make-up Gain can sometimes elevate noise that may have been previously inaudible at lower average levels.
Earlier I discussed how an elevated Drive control setting on the 286s will increase the input signal of low level source audio. In doing so you may pick up a suitable amount of compression. However you also run the risk of a noticeable increase in noise. In this particular scenario, try setting the Output Gain on the 286s to a negative value to offset the gain (and noise) that may have been introduced by the Drive setting.
Conclusion
I think it’s important to first learn the basics of Audio Compression from a conventional perspective. In doing so you will find it easier to get the most out of the unconventional controls on the dbx 286s, especially Drive and Density.
And let’s not forget that De-Essing is really nothing more than frequency band compression that will attenuate problematic energy. Establishing a visual reference to the energy will simplify the process of accurate correction.
-paul.
Julian Ludwig é diretor do Pro Áudio Clube, produtora de áudio Jacarandá, Loc On Demand e Jacarandá Licensing. Trabalhou para empresas como: Guaraná Antartica, TV Gazeta, NET, Chivas Regal, FNAC, Prefeitura de São Paulo, Mukeca Filmes, Agência LEW’LARA TBWA, Agencia MPM, Agência Content House entre outras. Fez trilhas para programas de TV como: Internet-se (Rede TV), Você Bonita (TV Gazeta), Mix Mulher (TV Gazeta), Os Impedidos (TV Gazeta), Estação Pet (TV Gazeta), CQC (TV Band) Vinheta Oficial TV Gazeta, entre outras. Também atuou em vários longas e curtas metragens, incluindo mixagem em 5.1 e serviços de pós-produção.